Help Center
Using the Product Editor Tool (v0.3)
Note: We've uploaded a few project files to the Product Connect Gallery for you to use when learning about Product Connect. The Quincy Kitchen Vignette is featured in the video above.
Editing a Product Connect Enabled Component
Introduction
Even though we’ve created and uploaded thousands of Product Connect enabled components to the 3D Warehouse, there are countless numbers of other product models on the warehouse that you might want to include in your projects and in your reports. Plus there are any number of models that you may have created from scratch, and we want you to be able to work with those too.
That’s why we think you’ll like Product Editor  .
.
The Product Editor tool is located in the Product Connect toolbar (View > Toolbars > Product Connect; see Figure 1); and is also located in the following menus:
Tools > Product Connect > Product Editor
Plugins > Product Connect > Product Editor
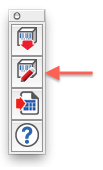
Figure 1. The Product Editor tool is located in the Product Connect Toolbar.
Product Editor gives you the ability to take any component, turn it into a product, and have it show up in your reports. The following examples are intended to shed some light on what we think might be some of the more typical use cases.
Editing a Product Connect Enabled Component
With Product Editor, you're now able to edit the attributes for any of the Product Connect enabled components that you download from the Trimble 3D Warehouse.
For example:
1) Open a new or existing SketchUp project.
2) Choose Get Products  and click through to the Product Connect Enabled Components collection.
3) Browse for and download a Product Connect enabled component from an available catalog (e.g. Brizo, Kraftmaid, etc.)
4) After placing the downloaded component into your project, ensure the product model is selected and then choose Product Editor  .
.
Note: Product Editor will display a list of any pre-selected components. If nothing in the model is selected, Product Editor will display a list of all In Model components (including any components that may be hidden). The latter may take a while depending on the complexity of your project.
5) Click on the component model that appears in the Product Editor list.
Product Editor will display a preview icon of the component along with the Product Name, Product Type, and Component Definition. Below, is a form containing attributes that pertain to the product’s default product type (e.g. Plumbing, Cabinet, etc.).
6) Along the top of the form are two drop-down menus for choosing a Product Type and Reporting Method. Review the Product Type (e.g. Plumbing) and Reporting Method and make any desired changes (for details on the different reporting methods, see below).
7) After specifying a product type, you then have the ability to edit/enter information into the fields below. For example, you could input a dollar amount into the Unit Price field.
Note:
To the far right of the Product Editor window is a Show Options link. This link opens a column that displays the current status of an attribute (default, unsaved or custom).
Default: The Product Connect enabled components that we've uploaded to the 3D Warehouse contain a default set of attributes. If you edit an attribute and save the save changes, you’ll still have the option to revert to the default, manufacturer specified value for a given attribute.
Unsaved: This status indicates that a chance has been made to a default or custom attribute, and that those changes have not yet been saved. If you have accidentally made a change to an attribute, and the status is 'Unsaved', you can choose Custom, or Default from the dropdown menu to revert to the previous value before saving the changes.
Custom: This status indicates that an edit has successfully been made to the attribute.
8) Click the Save Product Info button  in the bottom right corner of the Product Editor window.
Enabling a Generic Component
In addition to allowing you to edit information about products that are already Product Connect enabled, Product Editor also allows you to turn any component into a product that will then show up when you run Report Maker.
For example:
1) Open a new or existing SketchUp project.
2) Choose Get Models  (File > 3D Warehouse > Get Models).
3) Browse for and download any component from the 3D Warehouse (preferably something that fits within the realm of a ‘Product’).
4) After placing the downloaded component into your project, ensure the product model is selected and then choose Product Editor .
Note: Product Editor will display a list of any pre-selected components. If nothing in the model is selected, Product Editor will display a list of all In Model components (including any components that may be hidden). The latter may take a while depending on the complexity of your project.
5) Click on the component model that appears in the Product Editor list.
Product Editor will display a preview icon of the component along with the Product Name, Product Type, and Component Definition. Below, is a form containing attributes that pertain to the product’s default product type (e.g. Plumbing, Cabinet, etc.).
6) Choose a Product Type (e.g. Plumbing) and Reporting Method.
7) Enter relevant/known information into the form fields.
8) Click the Save Product Info button  in the bottom right corner of the Product Editor window.
9) Close the Product Editor window to return to the model.
Enabling a Material
Product Editor also gives you the ability to add information to Materials provided that the materials that are applied to the Faces inside of a component.
Product editor will not work on Materials that are:
• applied at the component level.
• applied to loose faces.
• applied to faces inside a group.
This functionality is designed to allow reporting for things like the paint color that is applied to a wall, or the tile that is applied to the back splash, or the material that is used for a counter, floor, or ceiling. Generally speaking, these situations can be categorized as ones in which the component (the wall, the floor, the counter) are not relevant to the schedule, but rather, it’s the material that is applied to the faces in that component, that need to be reported on.
To add information to a material:
1) Create a component (for the purpose of this example, you could draw a simple box and make it a component).
2) Right click on the component and choose Edit Component.
3) Apply a material to a face(s) in the component.
Note: There are a number of Product Connect enabled materials available for download from the 3D Warehouse. This help article includes additional information for Using Product Connect Enabled Materials.
4) Close the component.
5) With the component selected, choose Product Editor .
6) Click the disclosure triangle  next to the component.
7) Choose a material from the list.
8) Review/Edit the Reporting Method. Note: By default, materials are automatically assigned to the Finish schedule.
9) Enter relevant/known information into the form fields.
10) Click the Save Product Info button in the bottom right corner of the Product Editor window.
11) Close the Product Editor window to return to the model.
This is a Product Connect Support Page for:
Product Connect v. 0.3
Still using 0.2? We strongly recommend that you upgrade. Help articles for 0.2 are here.
Need SketchUp training?
Contact Us for online or in-person instruction.